How to fix led light strips
-
by Maisie Ou
- Last updated August 8, 2022
Table of Contents
LED light strips are an efficient, eco-friendly solution to your lighting needs. They provide a lot of variety in terms of color and size. Flexible LED light strips help you light unusual places where traditional sources of lighting simply cannot reach. And they allow you to be as creative as you want with your lighting projects. Some people use them to accentuate certain features in their homes, while others use them for task lighting or simply to add a touch of whimsy to their décor. No matter how you choose to use them, LED light strips are a great way to save energy and money while still getting the perfect amount of light for your needs.
LED light strips can be a great way to improve the look of your home, but sometimes they can stop working properly. In this blog post, we’ll show you how to fix LED light strips and get them working correctly again. We’ll also provide some tips on how to keep them in good condition for as long as possible.
1. Check the power supply

If you’re using LED light strips, it’s important to check the power supply before installation. Make sure the power supply is rated for the number of watts your light strip will use. Most LED light strips use 12 volts, so a 24-volt power supply will work for two strips in series. If you’re using more than two strips, you’ll need a higher voltage power supply. You can also use a lower voltage power supply, but you’ll need to increase the amperage. For example, if you’re using four 12-volt light strips that each require 2 amps, you’ll need an 8 amp power supply. Once you’ve determined the correct voltage and amperage for your light strip, connect it to the power supply and test it before proceeding with the installation. This will help ensure that your light strip will operate safely and correctly.
2. Check the connection between the strip and power supply

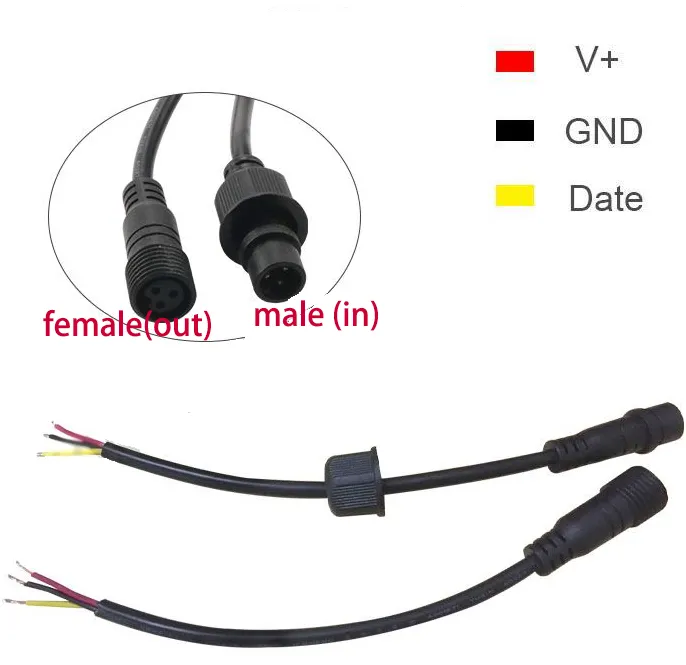
Before installing your LED light strips, it is important to check the connection between the strip and the power supply. If the connection is not secure, the strip may not work properly. In addition, the strip may overheat and cause a fire. To avoid these potential problems, make sure that the connection is tight and free of any gaps. Once you have confirmed that the connection is secure, you can proceed with installing your LED light strips.
3. Test the strip using a multimeter

Most LED light strips will have a built-in resistor, so you won’t need any extra resistors. To test your LED light strip, you’ll need a multimeter. First, turn off the power to the strip. Then, touch one probe of the multimeter to the positive lead of the strip and touch the other probe to the negative lead of the strip. The multimeter should show a reading of around 12 volts. If it shows a reading of 0 volts, then there is a break in the circuit and the strip will need to be replaced. Finally, turn on the power to the strip and make sure that all of the LEDs are lit up. If any of the LEDs are not lit up, then there is a problem with that particular LED and it will need to be replaced.
4. Resolder any broken connections
If you notice that your LED light strips are no longer working as they should, it may be time to check the connections. Over time, the solder joints can become loose, causing the electrical connection to break. In most cases, you can simply re-solder the broken connection to fix the problem. First, use a wire brush or sandpaper to clean the area around the joint. This will help the new solder to stick better. Next, apply a small amount of solder to the joint and heat it with a soldering iron until the solder melts and flows evenly. Allow the joint to cool for a few seconds before testing the connection. If it is still not working, you may need to replace the entire length of the LED strip.
5. Clean the strip with a cloth and alcohol

Over time, led light strips can become dirty and dusty, affecting the quality of the light they emit. To clean your led light strips, start by unplugging them from any power source. Next, use a dry cloth to dust off the strip, paying special attention to the area around the lights. Once the strip is free of loose debris, proceed to clean it with a cloth dampened with alcohol. Be sure to avoid getting any moisture on the lights themselves. Once you’ve finished cleaning the strip, allow it to air dry completely before plugging it back in. With a little regular maintenance, your led light strips will continue to provide years of trouble-free operation.
6. Add new adhesive to the back of the strip
Adhesive plays an important role in the function of LED light strips. It secures the strip in place and ensures that it makes a good connection with the surface to which it is applied. Over time, however, the adhesive can become less effective, particularly if the strip is exposed to heat or moisture. If your LED light strip is starting to lose its grip, you can try adding a new layer of adhesive. First, clean both the strip and the surface to ensure that there is no dirt or debris that could interfere with the bond. Then apply a thin layer of adhesive to the back of the strip, taking care to evenly cover the entire surface. Press the strip into place and allow it to dry for 24 hours before turning on the lights. With a fresh layer of adhesive, your LED light strip should stay securely in place.
Conclusion
If you’re experiencing any of the above issues with your LED light strips, don’t worry. You can fix them! All you need is a little bit of electrical know-how and some supplies from your local hardware store. Contact MSHLED today for more information on how to get your LED lights back up and running like new. We offer a wide range of services, including strip repair, installation, and even custom design work. Let us help you take your lighting to the next level.
