
LED light strips are the perfect way to add some extra light to your home. They’re also a great way to add some color and personality to a room. But how do you go about connecting them?

Flexible LED light strips are a great way to add accent lighting to your home. They are easy to install and can be used in a variety of ways. This guide will show you how to connect and install LED light strips. It is applicable to different types of LED strips, including RGB led strip china, 5730 led strip, cob led strips, SMD 5730, 5050 led strip lights, 3014 LEDs, 2835 led strip, 2216 led strip, and RGB addressable led lights.
The process of connecting LED light strips is actually quite simple. In most cases, all you need is a few basic supplies and some patience. Here’s a step-by-step guide on how to do it:
1. Decide where you want to install the LED light strip.
Before you can start connecting the LED light strip, you first need to decide where you want to install it. Some common places to install LED light strips to include behind TVs, under cabinets, around door frames, and in hallways.
2. Cut the LED light strip to the desired length.
Once you’ve decided where you want to install the LED light strip, you next need to cut it to the desired length. Most LED light strips come with a built-in cutting guide, so it’s easy to cut them evenly. Just make sure that you cut them at the correct spot – otherwise, they won’t be able to connect properly.
3. Plug in the power adapter.
Next, plug the power adapter into an outlet and then connect it to the LED light strip. The power adapter will provide power to the LED light strip and allow it to illuminate.
4. Connect the LED light strip to your device.
Now it’s time to connect the LED light strip to your device. This is done by connecting one end of the ribbon cable (usually red) to the power adapter and then connecting the other end of the ribbon cable (usually black) to your device. Make sure that all of the connectors are properly plugged in or else the LED light strip won’t work correctly.
How to Connect LED Light Strips With Each Other
There are two main ways to connect LED light strips with each other. The first is to use a solderless connector. These are specially made to connect two strips of LED lights together without the need for soldering. They simply “clip” onto the end of each strip, making for a quick and easy connection. The second way to connect LED light strips is by soldering them together. This creates a more permanent connection but does require a bit more time and effort. If you choose this method, be sure to use heat-resistant tape or shrink wrap to cover any exposed solder joints. This will help to prevent accidental short-circuits. Whichever method you choose, be sure to line up the positive and negative leads before making the connection. Once you’ve made the connection, your LED light strips will be ready to use!
1. Clipping
The Hippo Buckle LED Strip Lights Connector is a great way to easily connect two LED strips with each other. This connector has space for an LED light strip on each of its two ends. You simply have to install one end of your strip to the hippo buckle connector to connect the two strips together. The ‘buckle’ on the connector keeps the strips in place once installed. This is a great product for anyone who wants to easily connect two LED light strips together.

The solder-free LED strip light connectors are a great way to connect multiple LED light strips together. They have enough space to connect multiple LED strips with each other, and they are also compatible with dimmable LED strip lights. Plastic clips keep the LED strips in place and the connection secure. These connectors are a great way to ensure that your LED light strips are properly connected and supported.

Plastic clips keep the LED strips in place and the connection secure. You can use this connector to create custom light displays and achieve perfect alignment every time. With no soldering required, this connector is quick and easy to use, making it a great option for both professionals and DIY enthusiasts alike.
Your project might require your LED light strips to go around a corner or an unusual shape. That is where the solder-free LED wire connectors come in handy. These wire connectors have clips on both ends so you can use them to connect two LED light strips with each other. They are great for extending the length of your LED light strips. The best part about these wire connectors is that they do not require any soldering, so they are easy to use. Simply clip the two wires together and you are all set. These solder-free LED wire connectors are an essential piece of equipment for anyone who is looking to create unique lighting effects with their LED light strips.

2. Soldering
In some cases, it is not possible to use clips to connect LED light strips to each other. For example, if the strips will be mounted using aluminum frames, you will have to solder the LED tapes to each other. This is because the aluminum frames prevent the clips from making a secure connection. In addition, soldering provides a more permanent connection that is less likely to come loose over time. If you are not familiar with soldering, there are many online tutorials that can walk you through the process. With a little practice, you should be able to solder LED light strips together quickly and easily.
Soldering two LED light strips together is not a very difficult process, but it does require some specialized machinery and has a bit of a learning curve. To solder the strips together, you have to:
– Cut the strips to the size you want
– Remove the covering to expose the strip
– Match the ends of both strips exactly
– Solder them together
If you follow these steps, you should be able to successfully solder the LED light strips together.
Factors to Consider When Clipping and Soldering LED Strip Lights
- it is important to take care in cutting and connecting the wires. Always cut the wires from the copper connections, which can be found every 2 inches or so along the length of the tape. This will prevent damage to the essential components of the LEDs.
- In order to solder or clip the wires, the plastic casing will need to be removed from the tape next to the copper connection. Be careful not to damage the lettering on the tape as you expose the wires.
- When connecting two strips of LEDs through soldering or wire connectors, it is important to match up the correct colors of wire – red to red, green to green, and so on.
- To protect the connections, always use a heat shrink cover. Indoor and outdoor heat shrink covers are different, so make sure to get the correct type for your project.
LED Strip Lights Installation
LED strip lights are a versatile and energy-efficient lighting solution that can be used in a variety of applications. When installed correctly, they can provide even, consistent lighting that accentuates the features of any space. Here are some tips for installing LED strip lights:
1. Choose the right location: LED strip lights can be installed almost anywhere, but it’s important to choose a location that is suitable for the type of lighting you want. If you’re looking for task lighting, for example, you’ll want to install the lights under cabinets or in other work areas. For accent lighting, you may want to install them along walls or in other desired areas.
2. Prepare the surface: Before installing the LED strip lights, make sure the surface is clean and free of debris. This will help ensure that the lights adhere properly and provide a smooth, even light output.
3. Install the lights: Most LED strip lights come with an adhesive backing that makes installation quick and easy. Simply peel off the backing and apply the lights to the desired surface. For a more permanent installation, you may need to use screws or another type of fastener.
4. Connect the power supply: Once the LED strip lights are in place, connect them to a power supply. Some systems come with a plug-in power supply, while others require hardwiring to an existing circuit. Be sure to follow the manufacturer’s instructions when connecting the power supply.
How to Connect LED Light Strips to Power Supply
To connect your LED light strips to a power supply, there are a few options. You can connect each strip directly to the socket, which is especially useful for smaller spaces or projects. You can also use LED light strip clips to make the connection. For larger projects, it is usually recommended to hardwire your LEDs directly to the main power source of your home or building. Whichever method you choose, be sure to follow the instructions that came with your light strips to ensure a safe and successful installation.

Step 1: Calculate LED Light Strip Wattage
The next step is choosing the right power supply for your LED light strips. You need to make sure that only 80% of its overall capacity will be used in order not to exceed this amount and potentially shorten the lifespan or even damage an appliance from overuse!
For example, if you have a 3.8m long strip with a 5W/m power draw, you will need a transformer with a capacity of at least 19W to power it. You can find the power draw information for each LED strip on its packaging or on the manufacturer’s website. It is also important to take into account any additions or subtractions in the number of lights after you’ve cut and connected the tapes together. By taking these precautions, you can ensure that your LED light strips are properly powered and will provide optimal illumination.
Another consideration when calculating strip wattage is the voltage requirement for the strip. Generally, LED strips have a 12V or 24V voltage requirement. You have to choose a power source that is compatible with the voltage of the LED light strip, otherwise, it might not work.
If you’re using the same LED light tape for your entire project then multiply the length of the entire strip you want to power from a single source with the wattage per meter. This will give you the power capacity of your power source.
If you’re using different types of LED ribbon lights then calculate the wattage requirement for each of them and add it all up. This will give you an idea of how much juice they need to work. For example, if you have a 5-meter long LED strip that requires 12V and 1A then you’ll need a power source that can provide at least 60W (5m x 12v x 1A = 60W). Make sure to always err on the side of caution when selecting a power source because using one that isn’t powerful enough could result in subpar performance or even damage your LEDs.
Step 2: Find a suitable Power Supply
Now that you know how much power you need for your LED light strips to work, the next step is choosing the right power supply. You need to choose a power supply that will use only 80% of its overall power to run the LED tapes. This is important for the longevity of both your power supply and LED strips.
For example, if your LED strip wattage requirement was 18W, you will need a power source that has a minimum output of 232.5W (19/0.8). This will keep your power supply from getting overheated. Once you have the minimum wattage requirement down, choose one of four options for supplying power to your ribbon lights: an AC-DC adapter (wall plug), DC batteries, or a solar panel, Aluminum Case LED Power Supply. Each option has its own set of pros and cons that you should consider before making a purchase.
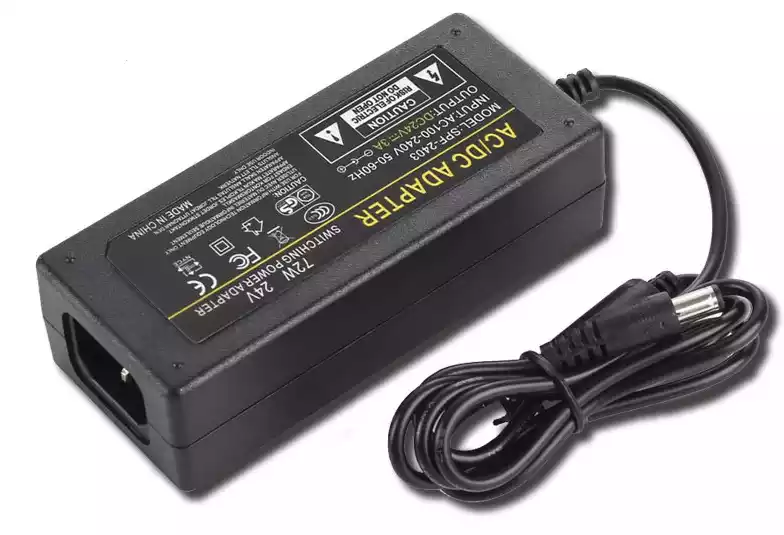
1)AC-DC adapters are one of the most common and easiest ways to provide power to LED light strips. They are available in a variety of voltages and wattages, making it easy to find one that meets your needs. AC-DC adapters also tend to be very inexpensive, making them a great option for budget-conscious shoppers. However, they can be bulky and difficult to hide, which may not be ideal if you are looking for a sleek and discreet setup. In addition, AC-DC adapters must be plugged into an outlet at all times, which can limit where you can place your light strips.
2)DC batteries are another popular option for powering LED light strips. Batteries offer the advantage of portability, allowing you to take your lights with you wherever you go. They are also relatively easy to hide, making them a good choice if discretion is important to you. However, batteries can be expensive to replace on a regular basis, and they may not provide enough power for longer runs of LED tape. In addition, batteries can introduce unwanted electrical noise into your lighting system.
3)Solar panels are a great option for those who want an environmentally friendly way to power their LED light strips. Solar panels convert sunlight into electricity, which can then be used to run your lights. Solar panels are relatively easy to install and require no ongoing maintenance costs. However, they can be expensive up front, and they may not provide enough power if you live in an area with limited sunlight hours. In addition, solar panels may not work well in cold weather environments.
4)One way to power your LED lights is to hardwire them directly into the electrical wiring in your space. This is an effective method, particularly for industrial or commercial spaces. You will need an Aluminum Case LED Power Supply to complete the hardwiring process. It’s important to note that this should be done by a professional electrician. Hardwiring your LED light strips offers several benefits. It eliminates the need for batteries or external power sources. Additionally, it can provide a more consistent level of power, which can extend the lifespan of your LED lights. When done properly, hardwiring your LED lights can be a safe and efficient way to power your lights.
Step 3: Connect LED Strip to Power Supply
Connecting your LED strip lights to a power source is a simple process.
Connecting an LED strip to a power supply is a straightforward process.
First, identify the positive and negative terminals on the LED strip. Then, connect the positive terminal to the positive terminal on the power supply, and connect the negative terminal to the negative terminal on the power supply. It is important to make sure that the polarity is correct;
if you reverse the connections, the LED strip will not work. Finally, plug in the power supply and turn it on. The LED strip should now be illuminated.
If not, check your connections and make sure that the power supply is turned on.
If you are using a socket, you can either connect each length of the strip to a single power supply or connect parallel strips together using a wire clip.
If you are hardwiring the strips, you can use LED light strip plug connectors to connect directly to the power source. In either case, it is important to ensure that your power supply is compatible with your LED strips to avoid voltage drop. With a few simple steps, you can easily enjoy the benefits of beautiful, efficient LED lighting in your home or business.
With a few simple steps, you can easily connect an LED strip to a power supply and enjoy custom lighting in your home or office.
Conclusion
LED light strips are an increasingly popular choice for lighting projects for a number of reasons. They are flexible and can be easily installed in tight spaces. Additionally, they emit less heat than traditional sources of lighting and have a very small carbon footprint. LEDs are also more energy-efficient than other types of lighting, which means that you can save money on your energy bills in the long run. One important thing to note is that you can easily connect multiple LED light strips together to create a custom lighting solution for your space.
Conclusion paragraph: If you’re looking for high-quality, custom-made LED light strips, reach out to us at MSHLED. We can design bespoke LED light tapes that are just the right length for your project – perfect for businesses, homes, and more. With over 10 years of experience in the lighting industry, we know how to create products that exceed expectations. Contact us today to get started!
