Choosing the Best Addressable LED Strip: Ultimate Guide
-
by Maisie Ou
- Last updated May 16, 2023
Table of Contents

Addressable LED strips are a type of LED lighting that offer dynamic and customizable lighting effects. Unlike traditional LED strips, addressable LED strips allow for individual control of each LED pixel. This means that each pixel can be programmed to display a different color or brightness, resulting in stunning visual displays.
One of the most popular types of addressable LED strips is the WS2812B LED strip. These strips use a single data line to control each pixel and can be easily programmed with various software and controllers. Addressable RGB LED pixel strip lights are a popular choice for creating colorful and eye-catching lighting displays, while addressable white LED strips offer more practical applications such as under-cabinet lighting or task lighting.
To connect an addressable LED strip, you will need to ensure that you have the correct power supply and controller. The power supply should match the voltage requirements of your specific strip, while the controller should be compatible with your chosen programming method.
Programming an addressable LED strip can seem daunting at first, but there are many resources available online to help you get started. Popular programming methods include using Arduino boards or specialized software such as FastLED or Adafruit NeoPixel.
There are many options available from various manufacturers. One popular choice is the Alitove WS2812B LED strip, which offers individually addressable WS2812B RGB 5050SMD LEDs for stunning visual displays.
Understanding the Concept of Addressable LED Strips
Individual Control: Addressable LED Strips
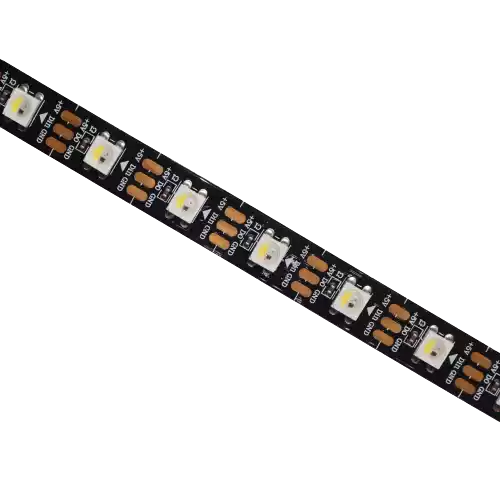
Addressable LED strips are a type of lighting technology that has revolutionized the way we think about lighting. Unlike traditional LED strips, addressable LED strips allow for individual control of each LED on the strip. This means that you can create dynamic lighting effects, such as chasing, flashing, and color-changing.
The right addressable LED strip can make your space come to life with vibrant colors and patterns. Addressable RGB LED strips use red, green, and blue LEDs to create a wide range of colors. With individually addressable LED strips, you can program each light to display custom patterns and animations.
Customization: Dream Color LED Strips
One of the most exciting developments in addressable LED strip technology is the advent of dream color LED strips. These specialized chips produce a wider range of colors than traditional RGB strips and offer even more customization options.
Dream color LED strips are perfect for those who want to take their lighting game to the next level. Whether you’re looking to create a unique atmosphere in your home or add some pizzazz to your stage show, dream color LEDs are sure to impress.
Applications: Home Automation & DIY Projects

Addressable LED strips have many applications beyond just home automation and stage lighting. They are also popular in DIY projects where people want to add some personality or flair to their creations.
For example, an artist might use addressable LEDs in their sculptures or installations as a way of adding movement or interactivity. Similarly, hobbyists might use them in model train sets or other miniature worlds as a way of creating realistic lighting effects.
The Benefits of Using Addressable LED Strips
Wide Range of Lighting Effects

Addressable LED strips offer a wide range of lighting effects that can be easily customized to fit any design or mood. These strips contain individual LEDs that can be controlled independently, allowing for unique patterns and color combinations. With addressable LED strips, you have the ability to create dynamic lighting effects that change in color, intensity, and pattern, adding depth and dimension to any space.
One popular use for addressable LED strips is accent lighting. By placing these strips behind furniture or along the edges of a room, you can create a warm and inviting atmosphere. These LED strips are highly versatile and can be used for a variety of applications beyond accent lighting. For example, they can be used in commercial settings such as bars or restaurants to add visual interest and enhance the overall ambiance.
Energy-Efficient and Cost-Effective
Not only do addressable LED strips offer stunning lighting effects, but they are also energy-efficient and long-lasting. Compared to traditional light bulbs or fluorescent tubes, these LEDs consume significantly less power while still providing bright illumination. This makes them an ideal choice for both residential and commercial settings looking to save money on their energy bills.
In addition to being energy-efficient, addressable LED strips are also cost-effective in the long run due to their longevity. These LEDs have an average lifespan of 50,000 hours or more when used correctly, which means they require less frequent replacement than traditional light bulbs or fluorescent tubes.
Enhance Your Space
If you’re looking for a way to enhance your home or business with stunning lighting effects while saving money on your energy bills, be sure to check out the benefits of using addressable LED strips. Whether you’re looking for accent lighting or full-room illumination, these versatile LEDs offer endless possibilities for customization and creativity.
How to Choose the Right Addressable LED Strip for Your Needs
Consider the Length of the LED Strip You Need

When choosing an addressable LED strip, one of the most important factors to consider is the length of the strip you need. It’s essential to measure the area where you want to install your LED strip and choose a product that matches that length. If you need a longer strip, it’s better to get multiple shorter strips that can be connected together rather than a single long strip.
It’s also important to remember that longer strips require more power, so make sure your power source can handle the amount of energy needed for your chosen LED strip. If you plan on cutting the LED strip into smaller sections, make sure it has designated cut points.
Determine the Level of Brightness Required
Another crucial factor when selecting an addressable LED strip is determining how bright you need it to be. The brightness level is measured in lumens per meter (lm/m). The higher this number, the brighter your LEDs will be.
If you’re using your LEDs for ambient lighting or decorative purposes, a lower brightness level may suffice. However, if you’re using them for task lighting or require high visibility, such as in retail or commercial spaces, then opt for higher lumens per meter rating.
Choose an Addressable LED Strip Compatible with Your Power Source and Controller

Before purchasing an addressable LED strip, ensure compatibility with both your power source and controller. Most addressable LED strips operate at 5V or 12V DC voltage levels and require specific amperage ratings depending on their length and brightness level.
Make sure to check whether your controller supports digital signals like WS2812B or APA102C protocols before purchasing an addressable LED strip. This will ensure seamless communication between your controller and LEDs for smooth color transitions and effects.
Decide on Color and Color-Changing Capabilities
Addressable LED strips offer endless color possibilities ranging from warm whites to vibrant hues. When choosing an addressable LED strip, decide on the color and color-changing capabilities you need.
If you want a single-color LED strip, choose one that produces the desired hue. If you prefer a color-changing option, make sure to select an RGB or RGBW strip with adequate programming options for your controller.
Factors to Consider When Choosing an Addressable LED Strip
Quality – The Most Important Factor to Consider When Choosing an Addressable LED Strip

Quality is the most important factor to consider. A high-quality LED strip will not only last longer but will also provide brighter and more accurate colors. You should look for LED strips that are made with high-quality materials and come from reputable manufacturers.
One way to determine the quality of an LED strip is by looking at its color rendering index (CRI). The CRI measures how accurately a light source can reproduce colors compared to natural light. A higher CRI means that the colors on the LED strip will appear more natural and vibrant. Another factor to consider is the lifespan of the LEDs. High-quality LEDs can last up to 50,000 hours or more, ensuring that your investment in the product lasts for years.
Controller and Software Compatibility – Important Factors for Proper Functionality
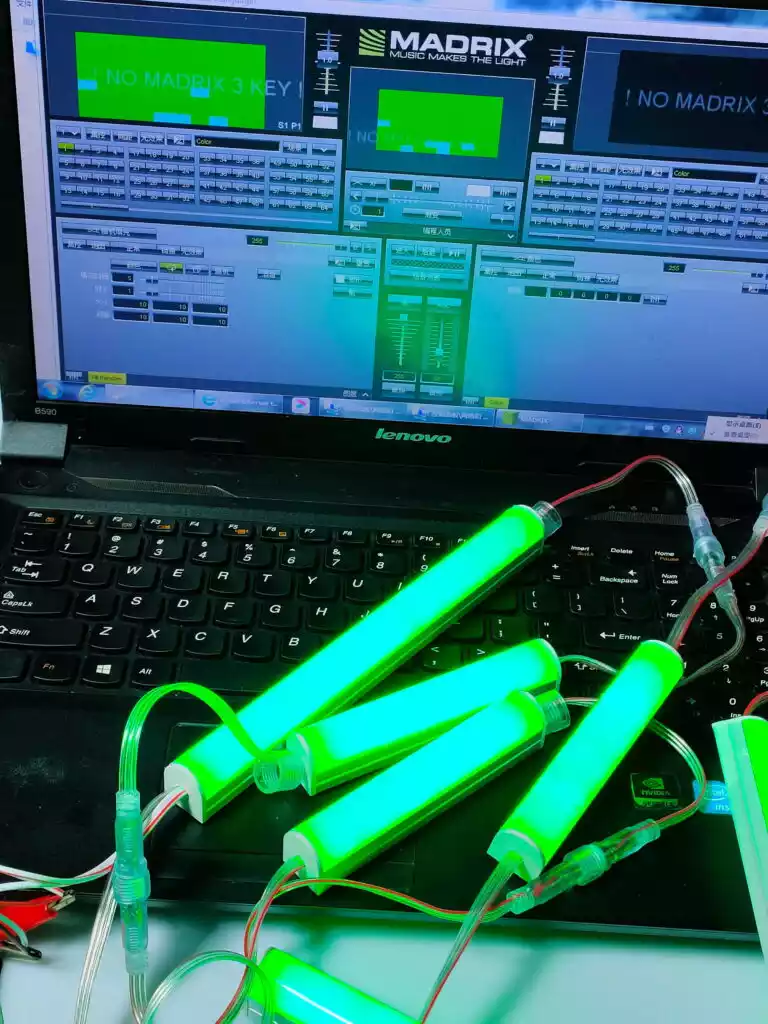
The type of controller and software compatibility are important factors when choosing an addressable LED strip. Different controllers have different capabilities, such as controlling color patterns or adjusting brightness levels. Some controllers may require specific software to function properly, so it’s essential to check if they’re compatible with your device before making a purchase.
It’s also crucial to ensure that your controller has enough output channels for your desired setup. Each channel controls a group of LEDs on the strip, so you’ll need enough channels for each section you want to control separately. If you plan on using multiple strips together, make sure they can be linked together easily through their respective controllers.
Number of LEDs per Meter and Spacing Between Them – Important Factors for Brightness and Color Accuracy
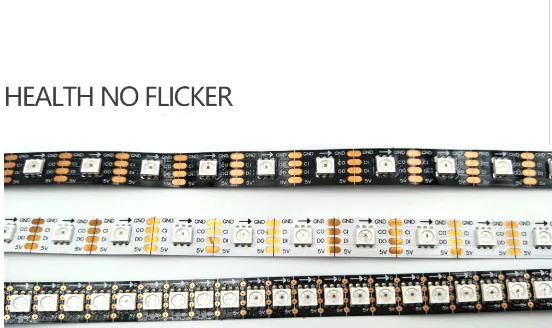
The number of LEDs per meter and the spacing between them are critical factors when considering the brightness and color accuracy in an addressable LED strip. More LEDs per meter mean greater brightness potential, while less spacing between them means more accurate color reproduction.
Most standard addressable LED strips have 30-60 LEDs per meter, but some high-density options can have up to 144 LEDs per meter. Higher-density strips offer more precise color control and a smoother color transition between each LED.
Type of Adhesive Backing and Its Strength – Important Factors for Easy Installation and Durability
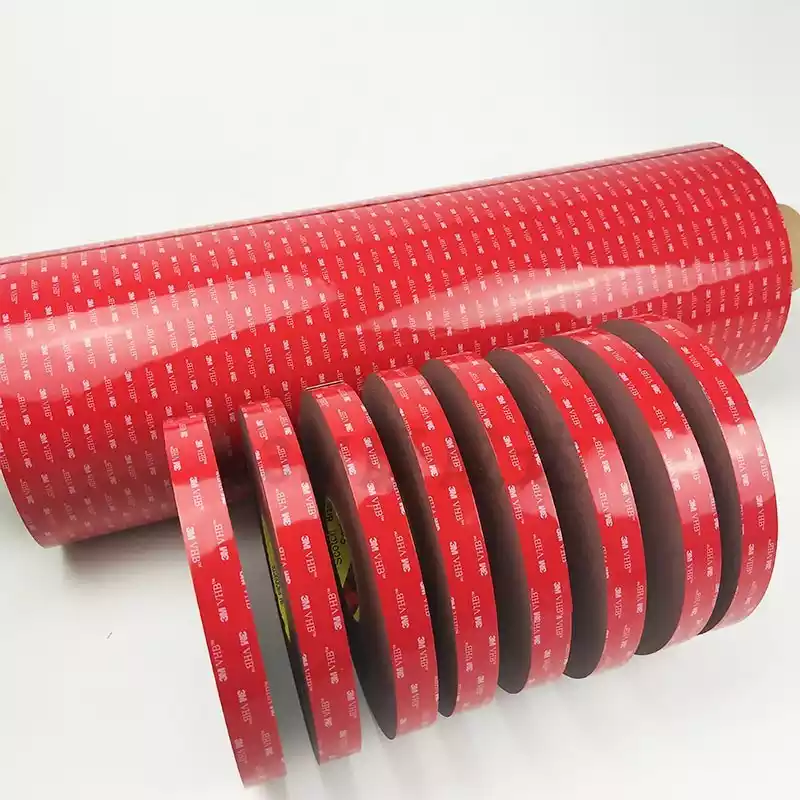
The type of adhesive backing and its strength are important factors in choosing an addressable LED strip. The adhesive should be strong enough to hold the strip in place without peeling off but not so strong that it damages surfaces when removed.
The most common adhesive types used on LED strips are 3M tape or foam tape. 3M tape is generally stronger and more durable, while foam tape is easier to remove without leaving residue behind. It’s also essential to ensure that the adhesive is compatible with the surface on your plan on installing the LED strip.
IP Rating – An Important Factor for Outdoor or Wet Environment Applications
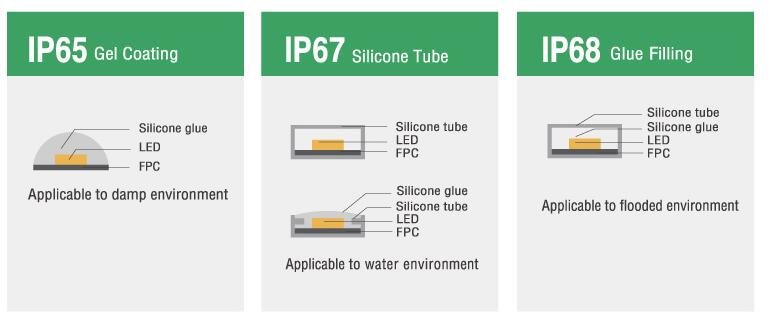
If you plan on using your addressable LED strip outdoors or in wet environments, the IP rating is an important factor to consider. The IP rating indicates how well the LED strip is protected against dust and water ingress.
An IP65 rating means that the LED strip is protected against low-pressure water jets from any direction, making it suitable for outdoor use. An IP68 rating offers even greater protection against dust and water immersion, making it ideal for underwater applications.
Length of the LED Strip and Power Requirements – Important Factors for Proper Installation and Avoiding Voltage Drop
The length of the LED strip and power requirements are critical factors in ensuring proper installation and avoiding voltage drop. A longer LED strip will require more power to operate correctly, which may result in a voltage drop if not adequately accounted for.
It’s crucial to calculate how much power your desired setup will require before purchasing your addressable LED strip. You should also consider adding additional power supplies or amplifiers if necessary to avoid voltage drop over long distances.
Different Types of ICs and Individually Addressable LED Strips
IC Models for Individually Addressable LED Strips

Individually addressable LED strips are becoming increasingly popular for their ability to control each individual LED. This is made possible by the use of integrated circuit chips (ICs) that allow for precise control over the lighting effects. There are different IC models available, including RGBIC and external IC models.
RGBIC models offer a wide range of color options and can be controlled using software such as MSI Mystic Light. These models typically have a higher number of LEDs per meter, with options like 300LEDs IP30 and flexible black PCB light IP30 non-waterproof DC5V. External IC models, on the other hand, have lower LED density but offer greater flexibility in terms of programming and customization.
When choosing an individually addressable LED strip, it is important to consider the voltage requirements. Many options require DC5V, which may require additional power supplies or adapters depending on your setup. Some IC chips may not be compatible with certain software or controllers.
Different Colors and Effects
One of the most appealing aspects of individually addressable LED strips is their ability to display different colors and effects. Single-color LEDs are commonly used for accent lighting or backlighting, while multi-color LEDs can create dynamic patterns and animations.
The choice of color depends on personal preference and the intended use case. Warm white or cool white LEDs are often used for general illumination purposes, while red or blue LEDs can create a more dramatic effect. Multi-color LEDs offer even greater versatility and can be programmed to change colors based on specific triggers or conditions.
Addressing Methods for LED Strips and Their Uses

SPI: Ideal for Short LED Strips
SPI (Serial Peripheral Interface) is a popular addressing method for controlling short LED strips. It is a synchronous communication protocol that enables the transfer of data between microcontrollers and peripheral devices. SPI uses four wires, including MISO (Master In Slave Out), MOSI (Master Out Slave In), SCLK (Serial Clock), and CS (Chip Select). The use of these wires makes it possible to control multiple LEDs simultaneously.
One of the significant benefits of using SPI for short LED strips is its fast data transfer rate, which can be up to 50 Mbps. This high-speed data transfer makes it ideal for applications where real-time control is essential, such as lighting effects in concerts or events. Since SPI does not require any addressing scheme or complex wiring, it is relatively easy to set up and use.
DMX: Preferred for Longer Runs

DMX (Digital Multiplex) is another widely used addressing method for controlling LED strips over longer runs. It is an industry-standard protocol that has been around since the mid-1980s and was originally designed for controlling stage lighting equipment. DMX uses a single cable to control up to 512 devices on a single run, making it ideal for large installations such as commercial buildings or outdoor displays.
One of the main advantages of using DMX over other addressing methods is its ability to control multiple devices with different functions simultaneously. For example, you can use DMX to control both RGB color mixing and dimming functions on an LED strip at the same time. DMX also provides reliable communication over long distances because it uses differential signaling technology that reduces noise interference.
I2C: Ideal for Controlling Individual LEDs

I2C (Inter-Integrated Circuit) is an addressing method that allows individual control of each LED in a matrix or grid pattern. It uses two wires – SDA (Serial Data) and SCL (Serial Clock) – to communicate with multiple devices on a single bus. This addressing method is ideal for applications that require precise control over each LED’s color and brightness, such as digital signage or large-scale displays.
One of the significant benefits of using I2C for controlling individual LEDs is its ability to reduce wiring complexity. Since it uses only two wires, it is possible to control hundreds or even thousands of LEDs with minimal wiring. I2C also allows for easy expansion of LED strips by adding more devices to the bus.
Tips for Using and Installing Addressable LED Strips Effectively

Plan Your Layout and Design Before Installing
Before installing an addressable LED strip, it is important to plan out the layout and design of where you want to place it. This includes deciding on the length of the strip, the location of the power supply, and how you want to control it. By doing this, you can ensure that your installation fits your desired location and purpose.
One way to plan out your installation is by using a sketch or diagram of the area where you want to install the LED strip. This will help you visualize where each component should go, including connectors and wiring. It’s also important to consider factors such as ambient lighting and color temperature when planning your installation.
Use Appropriate Power Supply
Using the appropriate power supply for your addressable LED strip is crucial in avoiding any electrical issues or damage to the strip. The power supply should match the voltage requirements of your LED strip, which is usually 5V or 12V.
When selecting a power supply, it’s important to choose one with enough wattage output for your specific LED strip installation. If too little wattage is supplied, it can cause flickering or dimming of LEDs. On the other hand, if too much wattage is supplied, it can cause overheating and damage to both the LEDs and the power supply.
Test Before Installation
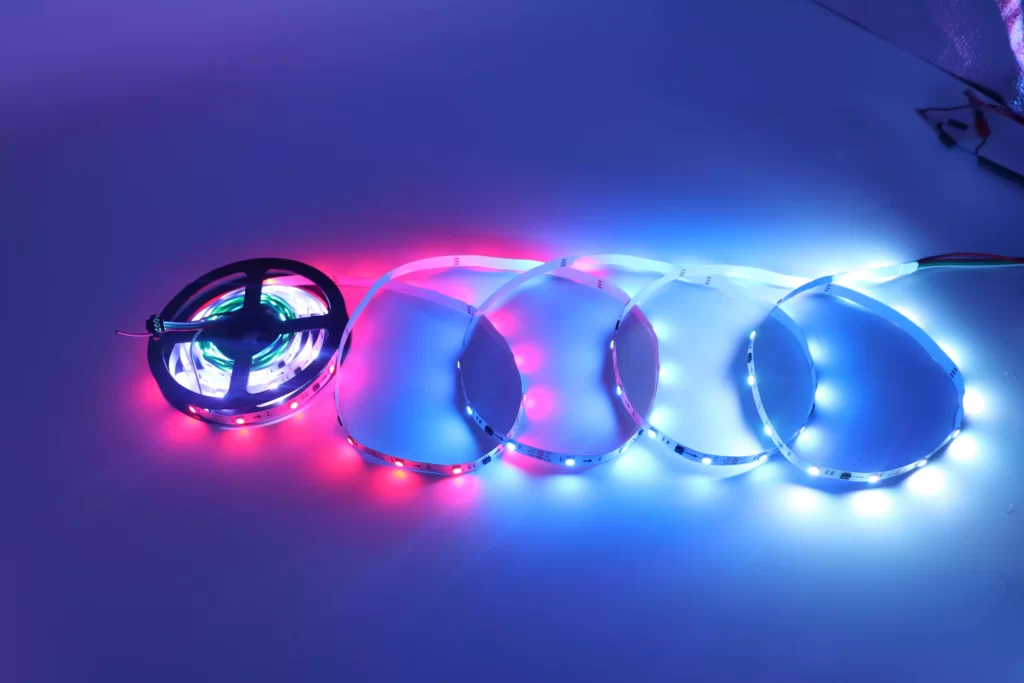
Testing your addressable LED strip before installation ensures that all LEDs are functioning properly and in sync with each other. This step helps identify any defects in individual LEDs or connectivity issues between them.
To test an addressable LED strip before installation, connect it directly to a compatible controller or microcontroller board using proper wiring techniques. Once connected, run a simple program that cycles through different colors or patterns on all LEDs in sequence. If any defects are found during testing, replace those faulty components before proceeding with installation.
Proper Connectors and Wiring Techniques
When connecting multiple strips together, use proper connectors and wiring techniques to avoid any connectivity issues or damage to the strips. It’s important to use connectors that match the type of LED strip being used, such as 4-pin JST SM connectors for WS2812B LED strips.
To connect multiple strips together, solder a connector on each end of the strip and connect them using a jumper wire. Be sure to follow the correct polarity when connecting positive and negative wires. It’s important to secure all connections with heat shrink tubing or electrical tape to prevent any accidental disconnections.
Consider Using a Controller or Software
Using a controller or software allows you to customize and control the effects and patterns of your addressable LED strip. This can include creating custom animations, color schemes, and brightness levels.
One popular controller for addressable LED strips is Arduino, which allows for easy programming and control of LEDs through its IDE software. Other options include Raspberry Pi and dedicated LED controllers such as those from Adafruit.
Where To Put Led Strips in Room
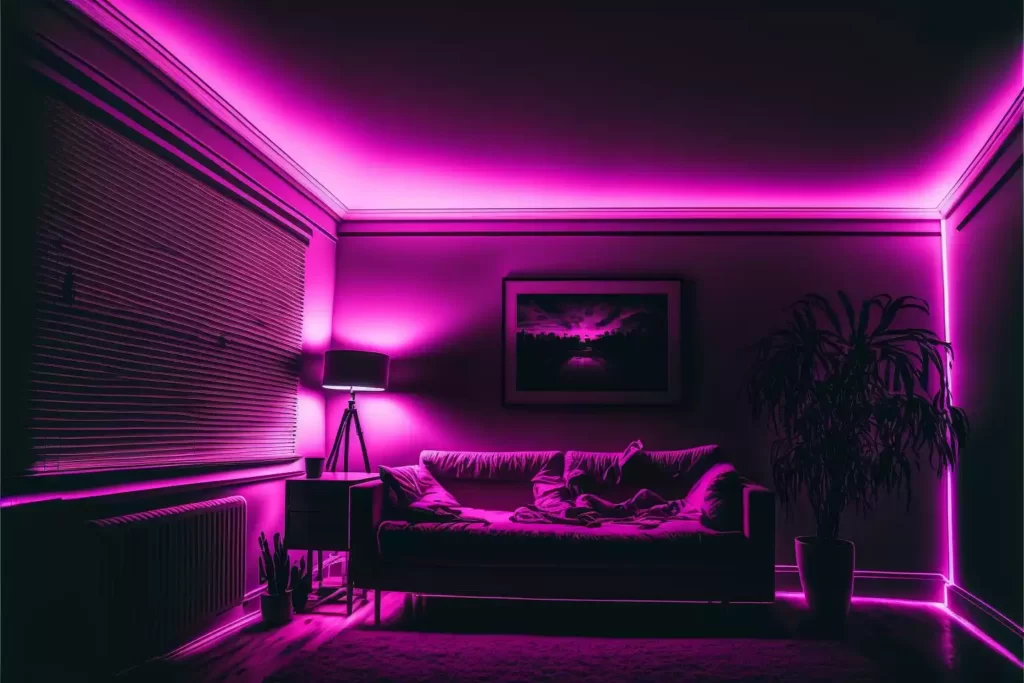
When deciding where to put LED strips in a room, consider factors such as ambient lighting, wall color, and furniture placement. For example, placing an addressable LED strip behind a TV can create an immersive viewing experience by syncing colors with on-screen content.
Another popular location for addressable LED strips is under kitchen cabinets or along baseboards in living spaces. These locations provide subtle accent lighting that can be customized based on mood or occasion.
Common Mistakes to Avoid When Working with Addressable LED Strips
Not Calculating Voltage Drop Properly
One of the most common mistakes when working with addressable LED strips is not calculating voltage drop properly. Voltage drop refers to the decrease in voltage as electricity flows through a wire or circuit. When using long lengths of LED strips, it’s important to consider voltage drop because it can cause the LEDs at the end of the strip to appear dimmer than those at the beginning.
To avoid this issue, it’s essential to calculate voltage drop based on the length of your LED strip and the current draw of each LED. This will help you determine how much power is needed to maintain consistent brightness across all LEDs. Make sure that you choose a power supply that can handle both the initial load and any additional load caused by voltage drop.
Overloading The Power Supply
Another mistake people make when working with addressable LED strips is overloading their power supply. It’s important to choose a power supply that can handle both the initial load and any additional load caused by voltage drop. Overloading your power supply can lead to overheating, which can damage your LED strip and create safety hazards.
To avoid overloading your power supply, calculate how much current your LED strip will draw and choose a power supply that can handle at least 20% more than that amount. This will ensure that your LEDs receive enough power without putting undue stress on your power supply.
Incorrect Wiring Of The LED Strip
Incorrect wiring of an addressable LED strip is another common mistake made by beginners. It’s crucial to follow proper wiring instructions when connecting multiple strips together or connecting them to a controller or power source. Incorrect wiring can lead to flickering lights, damaged components, or even electrical fires.
Always refer to manufacturer instructions when wiring an addressable LED strip. Make sure you understand how many amps are required for each segment of LEDs and use an appropriate wire gauge for each connection point. Be mindful of polarity – positive and negative wires must be connected correctly to avoid damage to the LED strip.
Ignoring The Maximum Length Of The LED Strip
Finally, ignoring the maximum length of an addressable LED strip can lead to problems with voltage drop and performance issues. Each LED strip has a maximum length that it can run before experiencing significant voltage drops or other issues. Exceeding this limit can cause your LEDs to appear dimmer or not work at all.
Always refer to manufacturer instructions when determining the maximum length of your LED strip. If you need longer lengths, consider using multiple power sources or amplifiers to boost signal strength and maintain brightness across all LEDs.
Maximizing the Potential of Addressable LED Strips
To maximize the potential of addressable LED strips, it is important to understand their benefits and how to choose the right one for your needs. Addressable LED strips offer a multitude of benefits such as flexibility, customization, and energy efficiency. They can be used in a variety of settings including homes, businesses, and entertainment venues.
When choosing an addressable LED strip, consider factors such as the type of ICs used, addressing methods, and color options. Different types of ICs offer varying levels of control over individual LEDs while addressing methods to determine how the LEDs are controlled. Color options also vary depending on the type of LED strip chosen.
To effectively use and install addressable LED strips, it is important to follow some tips such as planning out your design beforehand, using appropriate power sources and controllers, and ensuring proper grounding to prevent electrical interference.
Avoid common mistakes such as improper installation or wiring which can cause damage to both the LEDs and your electrical system. It is also important to avoid exceeding power limits or not providing adequate cooling for your LED strips.
FAQ
An addressable LED strip is a type of LED lighting product that allows you to control each individual LED on the strip independently. It means you can program different colors and lighting effects for each LED, creating dynamic and customizable lighting displays.
When selecting an addressable LED strip, consider the following factors:
- LED Type: Look for high-quality LEDs that offer good brightness, color accuracy, and energy efficiency. Common types include WS2812B, APA102, and SK6812.
- Density and Length: Consider the number of LEDs per meter (LED density) and the total length of the strip. Higher LED density allows for smoother lighting effects, while the length determines the coverage area.
- Power Requirements: Check the power consumption of the LED strip. Make sure your power supply can handle the load, or consider using multiple power sources for longer strips.
- Compatibility: Ensure that the LED strip is compatible with your desired controller or microcontroller platform. Common protocols include WS2812, APA102, and DMX.
- Waterproof Rating: Determine if you need a waterproof or non-waterproof LED strip, depending on the installation location and environmental conditions.
- Color Rendering: Look for LED strips that offer good color rendering properties, allowing for an accurate representation of colors.
- Flexibility: Consider whether you need a flexible LED strip that can be bent or shaped to fit different installations or rigid LED strips for more stable mounting options.
There are several popular brands known for producing high-quality addressable LED strips. Some of them include:
- Adafruit Industries
- MSH-Lighting
- GIDERWEL
- ALITOVE
- Pololu
- Aclorol
Addressable LED strips have a wide range of applications, including:
- Home Lighting: They can be used for ambient lighting, accent lighting, or decorative lighting in various areas of the home, such as living rooms, bedrooms, or kitchens.
- Entertainment Areas: LED strips are commonly used in media rooms, home theaters, or gaming setups to create immersive lighting effects that sync with movies, music, or games.
- Signage and Advertising: Addressable LED strips are popular for creating eye-catching signage, billboards, or advertising displays.
- Stage and Event Lighting: They are widely used in concerts, festivals, and other events to provide dynamic and synchronized lighting effects.
- Retail Displays: Addressable LED strips are utilized in retail stores for highlighting products or creating visually appealing displays.
- Automotive Lighting: LED strips are employed in automotive applications, such as undercar lighting, interior accents, or custom lighting installations.
Addressable LED strips can be controlled using various methods:
- Microcontroller Platforms: Arduino and Raspberry Pi are popular platforms for controlling addressable LED strips. You can use programming libraries and software to send commands to the LEDs.
- LED Controllers: Dedicated LED controllers, such as those with infrared or RF remotes, allow you to control the LED strip without the need for programming. These controllers often come with pre-programmed lighting effects and color options.
- DMX Controllers: For professional lighting setups, DMX controllers are used to control addressable LED strips along with other stage lighting equipment.
- Smartphone Apps: Some LED strips have companion smartphone apps that enable wireless control over Wi-Fi or Bluetooth connections.
The installation process may vary depending on the specific LED strip and your project requirements. In general, addressable LED strips can be easily attached using adhesive backing, which allows for flexible mounting options. Clean and prepare the surface where you want to install the strip, and carefully adhere it in the desired location. Follow the manufacturer’s instructions for any additional installation steps, such as cutting, soldering, or connecting multiple strips.
The lifespan of addressable LED strips varies depending on the quality of the LEDs and the usage conditions. On average, high-quality LED strips can last for tens of thousands of hours of use. However, factors such as heat dissipation, operating temperature, and proper usage can affect the lifespan. It’s always a good idea to check the manufacturer’s specifications for the estimated lifespan of the LED strip you are considering.
Yes, there are a few safety considerations to keep in mind. Firstly, ensure that the power supply and any additional components, such as connectors or controllers, are properly rated and compatible with the LED strip. Avoid overloading the power supply and follow the manufacturer’s instructions for installation and usage. Additionally, if you are using outdoor or waterproof LED strips, ensure that all connections and seals are secure to prevent water damage or electrical hazards.
Basic programming skills can be beneficial if you want to create custom lighting effects or program complex patterns. However, many addressable LED strips come with user-friendly software or apps that allow you to control the lights without any programming knowledge. These applications often provide pre-built effects and color options that you can easily select and apply to your LED strip.
Yes, there are addressable LED strips specifically designed for outdoor use. These strips are usually encased in a waterproof material (IP65 or higher) to protect them from moisture and environmental conditions. Ensure that the LED strip you choose has the appropriate level of waterproofing for your outdoor installation.
The power requirements vary depending on the length and type of LED strip. Most addressable LED strips operate at 5 or 12 volts, and the power consumption is usually specified in watts per unit length (e.g., watts per meter). Ensure that your power supply can handle the total power draw of the LED strips you plan to use.
Many addressable LED strips offer compatibility with popular smart home systems, such as Amazon Alexa or Google Home. You can control the LED strips using voice commands or integrate them into automation routines within your smart home setup. Check the product specifications or consult the manufacturer to ensure compatibility.
Yes, it is often possible to synchronize multiple addressable LED strips together to create a cohesive lighting display. This usually requires connecting all the strips to a single controller or using compatible controllers for each strip and ensuring they receive the same control signals.
The most common types of addressable LED chips used in LED strips are WS2812, WS2812B, WS2813, SK6812, and APA102. Each chip type has its own characteristics, such as the number of control bits and data transfer protocol, so make sure to choose a strip that matches your requirements.
Yes, most addressable LED strips can be cut to specific lengths at designated cutting points. However, you must follow the manufacturer’s instructions for cutting and reconnecting the strips. When extending the LED strip, you may need additional connectors or soldering, depending on the strip type.
Related Posts
Get in Touch with Us Now!
Do you have questions or feedback? We’d love to hear from you! Just fill out the form below, and our friendly team will respond ASAP.


